Contents
When faced with a burst pipe, your first step is critical: assess the damage quickly and accurately. You need to identify the problem and act fast to minimize water damage. Shutting off the water supply and draining the area are essential moves. Understanding the repair methods available can make a significant difference. What you do next could determine the success of your repair efforts.
Key Takeaways
- Conduct a thorough visual assessment to identify the extent of water damage before initiating repairs.
- Shut off the main water supply to prevent further flooding during repairs.
- Use appropriate repair methods based on pipe material and damage severity to ensure effective fixes.
- Test repaired areas for leaks and monitor pressure to confirm the integrity of the repair.
- Dry the affected area thoroughly and inspect for mold to prevent future complications.
Assessing the Damage
How can you accurately assess the damage from a burst pipe? Start with a detailed visual evaluation of the affected area. Look for signs of water pooling, discoloration on walls or ceilings, and any structural deformities. These indicators can help you determine the extent of the damage.
Next, check adjacent rooms or areas, as water can travel through walls and floors. Document your findings with photos and notes to aid in any necessary repairs or insurance claims.
Don’t forget to inspect insulation and nearby electrical systems, as they may also be compromised.
Conducting a thorough damage assessment is essential for effective repair. By being methodical and attentive, you’ll understand the immediate impact and prevent further complications down the line.
Shutting Off the Water Supply
Before you begin any repairs, it’s crucial to shut off the water supply to prevent further damage. Knowing effective water shutoff techniques can save you from a costly disaster.
Start by locating your main shutoff valve, usually found near your water meter. Turn it clockwise until it stops. If you can’t find it, check your home’s plumbing layout or ask a knowledgeable neighbor.
For added emergency preparedness, familiarize yourself with individual shutoff valves for appliances, like your dishwasher and washing machine. This way, you can isolate specific areas without shutting off the entire house.
Keep a wrench handy for stubborn valves, and consider marking the shutoff locations for easy access in the future.
Draining the Affected Area
Once you’ve shut off the water supply, the next step is draining the affected area to minimize water damage and prepare for repairs. Effective water removal is essential, so employ the right drainage techniques. Start by using a wet/dry vacuum to extract standing water. If the area is large, consider a submersible pump for quicker results.
Here’s a quick reference table to help you decide on the best method:
| Technique | Best For | Equipment Needed |
|---|---|---|
| Wet/Dry Vacuum | Small, contained areas | Wet/dry vacuum |
| Submersible Pump | Larger flood areas | Submersible pump |
| Towels and Mops | Final drying touches | Towels, mops |
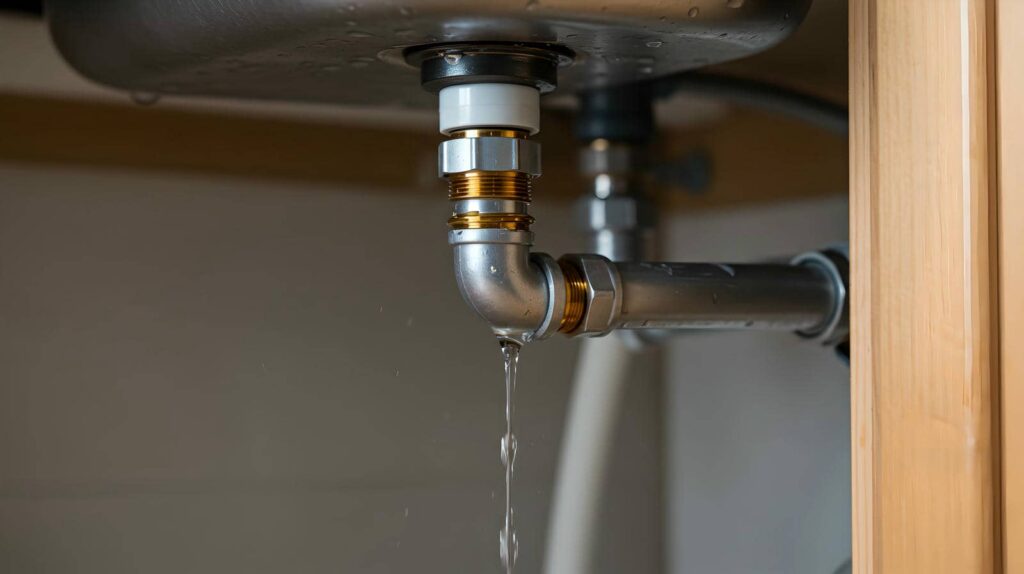
Identifying the Burst Pipe Location
Identifying the burst pipe location quickly is essential to minimizing damage and expediting repairs. Start by inspecting visible signs of water damage, such as damp walls or ceilings.
If you don’t see anything obvious, utilize leak detection methods like moisture meters or infrared cameras to pinpoint hidden leaks. These tools can help you locate the problem without tearing apart your property.
Next, check your pipe insulation; insufficient or damaged insulation can lead to burst pipes, especially in cold weather. Insulating pipes properly can prevent future issues, making it a key preventive measure.
Once you’ve identified the location, shut off the main water supply to limit further damage.
Choosing the Right Repair Method
How do you determine the best repair method for a burst pipe? Start by conducting a repair method comparison based on the pipe’s material and the extent of the damage.
For copper pipes, a soldering or compression fitting may be effective, while PVC pipes often respond well to solvent cement or coupling methods. Gauge material effectiveness by considering factors like pressure, temperature, and the environment around the pipe.
If the burst is minor, a simple epoxy patch might suffice. However, for larger ruptures, a complete section replacement might be necessary.
Think about long-term solutions versus quick fixes. You want your repair to last, not just patch the problem temporarily. By analyzing these aspects, you’ll choose a method that resolves the immediate issue and enhances the durability of your plumbing system.
Your proactive approach will contribute to a stronger, more resilient home.
Gathering Necessary Tools and Materials
Before beginning repairs, gather the necessary tools and materials to ensure a smooth process. Start with your tool selection: you’ll need a pipe cutter, an adjustable wrench, and a soldering iron for metal pipes.
Don’t forget safety gear, including gloves and goggles. As for material sourcing, confirm you have replacement pipe sections, connectors, and sealants handy. Depending on your plumbing system, you might require PVC, copper, or PEX materials.
It’s vital to choose high-quality components to ensure durability and avoid future issues. Consider visiting local hardware stores or trusted online retailers for reliable options.
If you’re part of a DIY community, reaching out for recommendations can also enhance your tool selection and material sourcing. Having everything ready saves time and fosters confidence as you tackle the repair.
A well-prepared workspace makes all the difference in mastering those burst pipe repairs.
Performing Temporary Repairs
While waiting for permanent repairs, it’s crucial to execute temporary fixes to minimize water damage and restore functionality.
Start with temporary patching using waterproof tape or rubber patches. First, clean the damaged area thoroughly to ensure a tight seal. Wrap the tape tightly around the leak, overlapping as you go to prevent further leakage.
For quick fixes, consider using a hose clamp or a piece of wood to stabilize the pipe. If the leak’s significant, you might need to shut off the water supply to the affected area to avoid a larger mess.
Always keep a bucket or towel handy to catch any escaping water during this process.
Executing Permanent Repairs
To execute permanent repairs on a burst pipe, you must first assess the damage to identify the extent of the problem.
Next, choose appropriate repair materials that match the pipe’s specifications for durability and compatibility.
Finally, implement effective repair techniques to ensure a long-lasting solution.
Assessing the Damage
Evaluating the damage from a burst pipe is essential for executing permanent repairs effectively. Start with a thorough damage assessment to identify the scope and severity of the issue.
Inspect surrounding areas for water infiltration, mold, or structural weaknesses. Document your findings to guide your repair strategy.
Next, conduct an impact evaluation to understand how the burst pipe affects your plumbing system and any connected appliances. This will help you prioritize repairs and determine if you need professional assistance.
Remember, addressing all damage promptly prevents further complications and ensures a lasting solution.
Choosing Repair Materials
Selecting the right repair materials is essential for executing lasting fixes on a burst pipe.
You’ll need to contemplate various repair material types, such as epoxy putty, pipe clamps, and PVC patches. Each type has its strengths, so appraise them based on your specific situation.
When choosing, focus on selection criteria like the pipe’s diameter, pressure rating, and the material’s compatibility with your existing plumbing.
Confirm that the repair material can withstand the environmental conditions, such as temperature fluctuations and moisture exposure.
By carefully evaluating these factors, you’ll foster a reliable repair that meets your needs and ensures long-term performance.
Making informed choices will save you time and money and enhance your confidence in tackling future plumbing issues.
Implementing Repair Techniques
Executing permanent repairs on a burst pipe requires a methodical approach to ensure long-lasting results.
Start by thoroughly cleaning the damaged area to ascertain a strong bond with your chosen repair materials. For effective pipe restoration, utilize appropriate repair techniques, such as pipe sleeves or epoxy compounds, which provide structural integrity.
If the damage is extensive, consider replacing the section entirely—this can often be the most reliable solution. Ascertain that all connections are secure and use pipe tape for added protection against future leaks.
After the repairs, test the system under pressure to confirm the effectiveness of your work. By following these steps, you’ll foster a sense of accomplishment and ascertain that your plumbing system is robust and reliable.
Testing the Repair
After completing your repair, testing is essential to ensure reliability.
Use pressure testing techniques to verify the integrity of the pipe, and conduct a visual inspection to identify any potential leaks or weaknesses.
These steps will help confirm that your repair is sound and ready for use.
Pressure Testing Techniques
When it comes to ensuring a successful burst pipe repair, effective pressure testing techniques are essential.
First, you’ll need to set up your pressure gauges accurately to monitor the system’s integrity. Begin by increasing the pressure to the recommended level and holding it for a specified duration. This helps identify any weaknesses in your repair.
Pay close attention to the readings—any drop in pressure indicates potential leaks that require immediate attention. You can also utilize specialized leak detection equipment to enhance your results.
After testing, if everything checks out, you can confidently proceed, knowing your repair is sound.
Visual Inspection Methods
While pressure testing is essential, visual inspection methods play an important role in confirming the integrity of your burst pipe repair. Employing effective inspection techniques allows you to identify visual clues that indicate potential issues. Look for signs of water damage, corrosion, or unusual wear around the repair site.
| Visual Clue | Inspection Technique |
|---|---|
| Water Staining | Examine surrounding areas |
| Surface Cracks | Inspect for fractures |
| Discoloration | Check for color changes |
Restoring the Affected Area
Once you’ve successfully repaired the burst pipe, restoring the affected area becomes essential to prevent further damage and ensure your home returns to its original condition.
You’ll want to focus on effective restoration techniques and thorough area cleanup to make certain everything’s back in shape.
Here are some steps to guide you:
Dry the Area: Use fans or dehumidifiers to eliminate moisture.
Inspect for Mold: Check for any signs of mold growth and treat immediately.
Replace Damaged Materials: Remove and replace any warped or stained drywall, flooring, or insulation.
Paint and Finish: Touch up paint or reapply finishes to restore the aesthetic appeal.
Wrap-Up
Mastering burst pipe repairs is like traversing a maze; each step requires careful attention and strategic decisions. Just as a misstep can lead to dead ends, overlooking any part of the repair process can result in further issues down the line. By effectively evaluating damage, shutting off the water, and choosing the right repair method, you create a solid pathway toward a lasting solution. Stay vigilant, and you’ll avoid the pitfalls of future leaks and flooding.
Recent Posts
Top Tools for Efficient Home Flood Recovery
When facing home flood recovery, it’s vital to have the right tools at your disposal.
7 Best Tools for Effective Flood Cleanup
When tackling flood cleanup, knowing what tools to use, understanding their purpose, and mastering their
What Are Effective Techniques for Detecting Pipe Leaks?
Detecting pipe leaks is essential for maintaining infrastructure and preventing costly damage. You can utilize