Contents
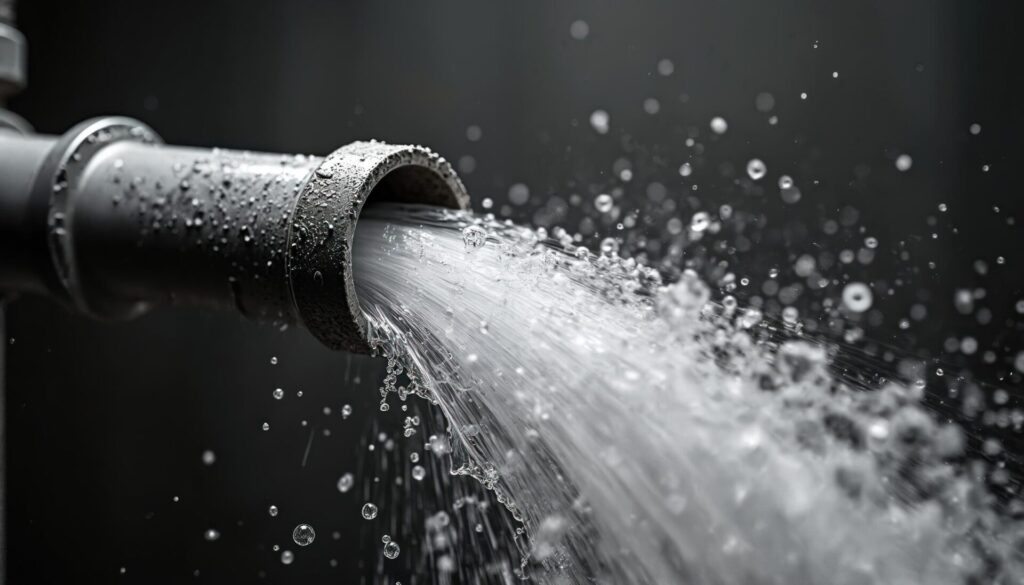
Did you know that burst pipes can release hundreds of gallons of water in just a few hours? This can lead to significant damage if not addressed quickly. Knowing the correct steps to take can make all the difference in minimizing that damage. You’ll need to act fast, but understanding the process is vital for a successful cleanup. Let’s explore the essential strategies every homeowner should know.
Key Takeaways
- Immediately shut off the main water supply to prevent further flooding and damage after a burst pipe.
- Document the incident with photos for insurance claims and assess immediate safety risks like electrical hazards.
- Use absorbent towels, buckets, and a wet/dry vacuum to contain and remove standing water effectively.
- Inspect affected areas for water damage, checking hidden spaces for moisture and potential mold growth.
- Maintain indoor humidity below 50% and ensure proper ventilation to prevent mold after cleanup.
Understanding the Causes of Burst Pipes
When temperatures drop considerably, it’s essential to understand how this can lead to burst pipes.
Frozen pipes are a common issue during cold weather. As water freezes, it expands, leading to increased pressure within the pipe. This pressure buildup can exceed the pipe’s capacity, causing it to crack or burst.
You mightn’t realize that even a small section of pipe can create significant problems if it freezes.
Insulating your pipes and keeping your home heated can help prevent this issue. Regularly checking for drafts and sealing them can also reduce the risk of frozen pipes.
If you suspect a pipe has frozen, act quickly. Thawing it gently can prevent further damage.
Understanding these causes helps you take proactive measures, ensuring your home stays safe and functional during winter months. By being informed, you foster a sense of community and responsibility among fellow homeowners.
Immediate Steps to Take After a Pipe Bursts
If you experience a burst pipe, quick action is essential to minimize damage and restore normalcy. First, shut off your main water supply to prevent further flooding.
Next, locate your emergency contacts, including a plumber or water damage restoration service, and reach out for professional assistance. Once the water stops flowing, assess the situation for immediate safety risks, such as electrical hazards.
If water is pooling, use towels or buckets to contain it temporarily, and elevate furniture to protect it from damage. In some cases, you might implement temporary fixes, like using pipe tape or clamps to slow leaks until professionals arrive.
Document the incident for insurance purposes by taking photos of the affected areas. Remember, acting swiftly reduces damage and provides peace of mind, knowing you’re on the path to recovery.
Assessing the Damage: What to Look For
How do you effectively assess the damage after a burst pipe? Start by identifying the extent of water damage in affected areas. Check walls, ceilings, and floors for discoloration, warping, or peeling paint, as these can indicate moisture infiltration.
Inspect furniture and personal belongings, too, for signs of saturation or mold growth. Pay particular attention to hidden spaces, like behind cabinets or under carpets, where moisture can linger.
Next, conduct mold detection by looking for mildew or musty odors. If you spot any, it’s essential to act quickly, as mold can develop within 24 to 48 hours.
Use a moisture meter if available to measure humidity levels in various materials. Remember, thorough assessment helps you understand the damage and guides you in planning effective remediation.
This proactive approach fosters a sense of community as you tackle the issue together with professionals or neighbors.
Essential Tools and Materials for Cleanup
Having the right tools and materials is essential for effective cleanup after a burst pipe. Start by gathering your cleanup supplies: heavy-duty trash bags, a mop, and absorbent towels to manage excess water. For larger areas, a wet/dry vacuum becomes invaluable.
You’ll also need a sturdy bucket for collecting debris and contaminated materials.
Don’t forget your safety equipment. Wear rubber gloves to protect your hands from contaminants, and consider a mask if mold is a concern. Goggles can shield your eyes from splashes, especially if you’re working in a confined space.
Additionally, have a flashlight handy to inspect dark corners and ensure you don’t miss any hidden moisture.
Water Extraction Techniques for Homeowners
After a burst pipe, it’s essential to assess the extent of water damage before starting cleanup.
You’ll need to employ effective extraction methods to remove standing water efficiently, followed by proper drying and restoration techniques to prevent mold growth.
Understanding these steps will help you regain control of your home quickly and effectively.
Assessing Water Damage
When a burst pipe floods your home, accurately evaluating the water damage is essential for effective cleanup.
Start by performing a thorough assessment to understand the extent of the damage. Follow these steps:
Furniture Inspection: Check all affected furniture for water saturation. Remove and dry items that can be salvaged, while marking those that are beyond repair.
Flooring Assessment: Examine the flooring material. Carpets may need professional cleaning or replacement, while hardwood floors might require immediate drying to prevent warping.
Wall and Ceiling Check: Inspect walls and ceilings for discoloration or bubbling, indicating moisture intrusion. Address any mold concerns promptly.
Effective Extraction Methods
To effectively extract water from your home after a burst pipe, you’ll need to act quickly and methodically.
Start by gathering appropriate extraction equipment, such as wet/dry vacuums and submersible pumps, which can considerably speed up the process. Familiarize yourself with extraction techniques like suctioning and siphoning, ensuring you target the most affected areas first.
If water is trapped in carpets or upholstery, use the vacuum’s upholstery attachment for efficient removal. Remember to keep an eye on moisture levels, as prolonged exposure can lead to mold growth.
Drying and Restoration Techniques
Once you’ve successfully extracted the water, the next step is drying and restoration.
To effectively dry your space and prevent mold growth, follow these essential techniques:
Dehumidifier Usage: Place dehumidifiers in affected areas to reduce moisture levels. Aim for a humidity level below 50% to inhibit mold.
Ventilation Strategies: Open windows and doors to promote airflow. Use fans to circulate air, especially in confined spaces.
Monitor Drying Progress: Check moisture levels with a hygrometer. Verify all surfaces, including walls and floors, are completely dry.
Drying Out Affected Areas: Best Practices
Although a burst pipe can cause significant damage, effective drying of affected areas is vital for preventing mold growth and structural deterioration. Start by removing any standing water with a wet/dry vacuum.
Next, utilize dehumidifier usage to extract moisture from the air, aiming to maintain indoor humidity below 50%. Position your dehumidifier in the most affected area and keep it running continuously until the area is completely dry.
Incorporating ventilation techniques is important, too. Open windows and doors to promote airflow, and use fans to circulate air in enclosed spaces.
This combination of dehumidification and ventilation will expedite the drying process. Regularly check moisture levels with a hygrometer to ensure effective drying.
Preventing Mold Growth After Water Damage
After successfully drying out affected areas, your next priority is preventing mold growth, which can develop rapidly in damp environments.
Implementing effective mold prevention strategies is vital for maintaining a healthy home. Here are three essential steps to take into account:
Humidity Control: Keep indoor humidity levels below 50%. Use dehumidifiers in affected areas to maintain ideal moisture levels.
Ventilation: Ensure proper air circulation by opening windows and using exhaust fans in kitchens and bathrooms. This helps reduce moisture buildup.
Regular Inspections: Check for any signs of water damage or leaks regularly. Address issues promptly to prevent mold spores from taking root.
Repairing or Replacing Damaged Pipes
When dealing with burst pipes, evaluating the damage is essential before deciding whether to repair or replace them. Start by inspecting the pipe materials involved. Copper, PVC, and PEX each have different lifespans and vulnerabilities.
For minor leaks in flexible materials like PEX, you might choose to repair using clamps or epoxy. However, if the damage is extensive or affects older materials, replacement is often more effective.
Next, consider the installation techniques. Proper installation plays a critical role in pipe longevity. If you’re uncertain about your skills, hiring a professional can ensure that the new pipes are correctly fitted and sealed, minimizing future risks.
Long-Term Solutions to Prevent Future Bursts
To prevent future pipe bursts, consider investing in pipe insulation and scheduling regular maintenance checks.
Insulation helps maintain ideal temperatures, reducing the risk of freezing.
Additionally, routine inspections can identify potential issues before they escalate into major problems.
Insulation for Pipes
While you may not think about it often, insulating your pipes is an essential step in preventing future bursts and minimizing damage during colder months.
Proper pipe insulation can save you time and money in the long run. Here are three effective methods to contemplate:
Foam Pipe Insulation: This is easy to install and offers excellent thermal resistance. Simply wrap the foam around the pipes to keep them warm.
Heat Tape: This electrical option provides direct heat to your pipes, preventing freezing in extreme temperatures. Make sure to follow the manufacturer’s instructions for safety.
Caulking and Sealing: Seal gaps around windows and doors to minimize cold air exposure.
Taking these steps ensures your plumbing system remains protected and efficient throughout winter.
Regular Maintenance Checks
Insulating your pipes is only one part of a thorough strategy to prevent burst pipes.
Regular maintenance checks, including routine pipe inspections, are essential for identifying potential issues before they escalate. Schedule seasonal checkups to assess the condition of your plumbing system, focusing on vulnerable areas prone to freezing or wear.
During these inspections, look for signs of leaks, corrosion, or sediment buildup that might lead to future bursts. Don’t forget to check your water pressure; excessive pressure can strain your pipes.
Review
By mastering burst pipe cleanup, you can turn a potential disaster into a manageable challenge. Remember, acting swiftly and methodically can save your home from extensive damage, like a knight defending a castle. Equip yourself with the right tools and knowledge to tackle any leaks head-on. With diligence, you’ll restore your home and fortify it against future mishaps. Stay proactive, and you’ll keep your sanctuary safe and sound for years to come.
Recent Posts
Top Tools for Efficient Home Flood Recovery
When facing home flood recovery, it’s vital to have the right tools at your disposal.
7 Best Tools for Effective Flood Cleanup
When tackling flood cleanup, knowing what tools to use, understanding their purpose, and mastering their
What Are Effective Techniques for Detecting Pipe Leaks?
Detecting pipe leaks is essential for maintaining infrastructure and preventing costly damage. You can utilize