Contents
When faced with such an unexpected crisis, knowing the essential steps for recovery can make all the difference. From identifying the leak to preventing future incidents, each action you take plays a vital role in minimizing damage and costs. Understanding these steps can help you navigate the recovery process more effectively. What comes next may surprise you.
Key Takeaways
- Immediately turn off the main water supply to prevent further flooding and damage.
- Identify and document the source of the leak for insurance purposes.
- Remove standing water using pumps or wet vacuums, prioritizing high-risk areas.
- Use dehumidifiers and fans to thoroughly dry affected areas and prevent mold growth.
- Replace damaged materials while ensuring compliance with building codes and document the restoration process.
Identify the Source of the Leak
When a burst pipe occurs, identifying the source of the leak is essential for effective recovery. Start by inspecting visible pipes for signs of moisture or damage.
Use leak detection methods, like acoustic listening devices or thermal imaging, to pinpoint hidden leaks. These tools can save you time and effort, ensuring you tackle the root of the problem.
Pay close attention to areas where plumbing maintenance is often neglected, such as behind walls or under floors. If you notice damp spots, mold, or unusual water stains, these could indicate a hidden leak.
Once you locate the leak, document the damage for your records, as this will assist in any insurance claims.
Turn Off the Water Supply
Immediately turn off the water supply to prevent further damage from the burst pipe. Locate your main shut-off valve, usually found near the water meter or where the water line enters your home. Turning this valve clockwise will stop the flow of water, which is essential in these emergency measures.
If you’re unsure which valve controls your water supply, check your home’s plumbing diagram or consult with a neighbor who can assist you.
Once the water is off, open faucets to drain any remaining water in the pipes, this helps relieve pressure and minimizes leaks.
If the burst pipe is still gushing water, you may need to temporarily seal the area with duct tape or a hose clamp until professional help arrives. Taking swift action protects your property and fosters a sense of community as you share recovery tips with others facing similar issues.
Assess the Damage
After shutting off the water supply, you should assess the damage to understand the extent of the issue. Conducting a thorough damage assessment is essential for effective repair evaluation. Start by inspecting visible areas for any signs of water damage, such as discoloration or warping. Check hidden spaces like behind walls or under floors for any moisture that might not be immediately apparent.
| Area Inspected | Damage Observed | Next Steps |
|---|---|---|
| Ceiling | Stains and sagging | Check for leaks above |
| Walls | Bubbling paint | Remove damaged drywall |
| Flooring | Warping or swelling | Replace affected sections |
| Basement/Crawl Space | Standing water | Investigate source |
Document your findings for reference. This organized approach will help you prioritize repairs and coordinate with professionals, fostering a sense of community in the recovery process.
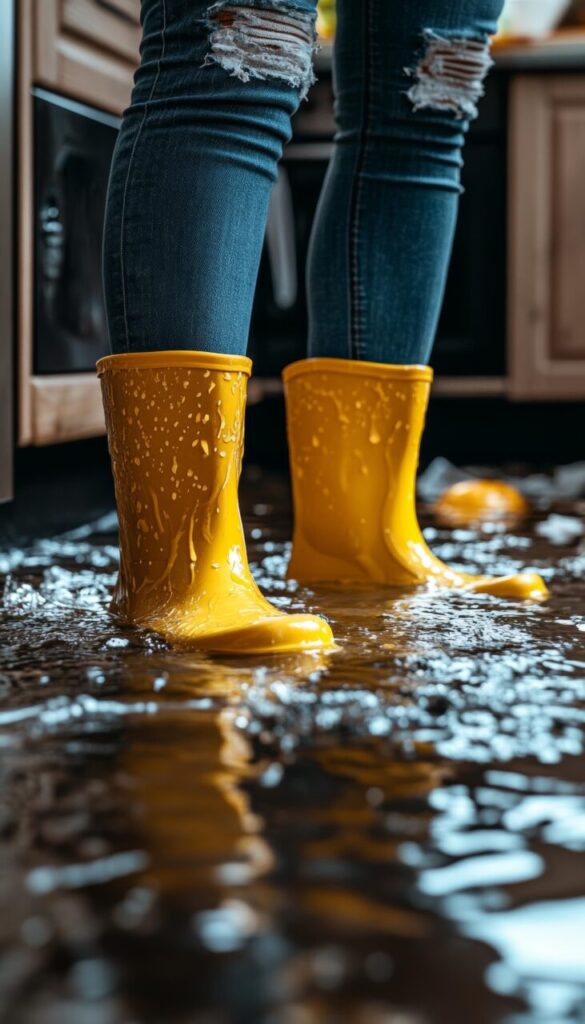
Remove Standing Water
Before you begin removing standing water, prioritize safety by wearing protective gear and ensuring electrical hazards are addressed.
Use effective water extraction techniques, such as pumps or wet vacuums, to remove the water efficiently.
Properly managing this step is essential to prevent further damage and mold growth.
Safety Precautions First
Although it may be tempting to assess the damage right away, your first priority should be to remove any standing water to secure safety.
Start by donning personal protective equipment (PPE) like gloves, boots, and masks to shield yourself from contaminants. Follow your emergency response plan to ensure a coordinated effort if you’re working with a team.
Before you begin, check for electrical hazards, and if necessary, cut off the power supply to affected areas. Use a wet/dry vacuum or mops to remove water, prioritizing high-risk areas first.
Stay vigilant for structural damage and hidden hazards, as these can pose serious risks. Remember, safety is the cornerstone of effective recovery, so take these precautions seriously.
Effective Water Extraction Techniques
Water extraction is critical in mitigating damage after a pipe burst. To effectively remove standing water, you’ll need to employ various water removal methods and specialized extraction equipment. Here’s a quick overview of techniques you can use:
| Method | Equipment Used | Effectiveness |
|---|---|---|
| Submersible Pumps | High-capacity pumps | Excellent for deep water |
| Wet/Dry Vacuum | Portable vacuums | Ideal for small areas |
| Squeegees | Manual tools | Great for final touches |
| Dehumidifiers | Air movers | Reduces moisture post-extraction |
| Truck-mounted Units | Heavy-duty systems | Best for large-scale jobs |
Dry Affected Areas
Once you’ve removed standing water, it’s essential to focus on drying the affected areas thoroughly.
Use dehumidifiers effectively to reduce humidity levels and accelerate the drying process.
This step prevents mold growth and ensures that your property’s restoration is successful.
Remove Standing Water
As you begin the recovery process from a burst pipe, removing standing water is essential to prevent further damage and mold growth.
Start by identifying all areas affected by the leak and assess the extent of the standing water. Use a wet/dry vacuum for efficient water removal, ensuring you clear out as much water as possible.
For larger volumes, consider renting a sump pump to expedite the process. Pay special attention to hidden pockets of water, such as under floorboards or behind walls, as these can lead to mold problems later.
Once you’ve removed the standing water, dry the surfaces thoroughly to minimize moisture retention. This proactive approach will help ensure a successful recovery and safeguard your home.
Use Dehumidifiers Effectively
After removing standing water, it’s important to address the moisture that remains in the affected areas.
To achieve effective humidity control, strategically place dehumidifiers in spaces with high moisture levels. Make sure you position them in central locations, away from walls and furniture, to maximize airflow and efficiency. For larger areas, use multiple units to enhance moisture extraction.
Monitor humidity levels regularly with a hygrometer, aiming for a range of 30-60%. Keep doors and windows closed during operation to prevent outside moisture from entering.
Don’t forget to empty the dehumidifier’s water reservoir frequently or set up a continuous drain option if available.
Sanitize and Clean Surfaces
Sanitizing and cleaning surfaces affected by a burst pipe is essential for preventing mold growth and ensuring a safe environment.
Start by identifying all impacted areas, including walls, floors, and furniture. Use effective sanitation techniques, such as scrubbing surfaces with a solution of warm water and detergent to remove dirt and debris.
After cleaning, apply surface disinfectants that are EPA-approved for mold and mildew to eliminate any lingering pathogens. Ensure you follow the manufacturer’s instructions for proper dilution and contact time.
Pay special attention to porous materials, as they may require replacement if they harbor moisture. Once surfaces are sanitized, allow them to dry completely to further discourage mold growth.
Repair or Replace Damaged Pipes
Once you’ve assessed the damage caused by a burst pipe, it’s crucial to determine whether to repair or replace the affected sections. The decision hinges on factors like pipe materials, the extent of the damage, and cost analysis. If the pipes are outdated or greatly compromised, replacing them can save you future hassle and expense. Conversely, minor leaks may warrant a repair.
Here’s a quick comparison to help you decide:
| Option | Pros | Cons |
|---|---|---|
| Repair | Cost-effective, quick fix | May not last long |
| Replace | Long-term solution, durable | Higher upfront costs |
| Evaluate | Professional advice available | Can be time-consuming |
In making your choice, consider immediate costs and the long-term implications for your home. You want a solution that feels secure and aligns with your needs.
Check for Mold Growth
After addressing the burst pipe, it’s essential to check for mold growth by identifying moisture sources.
Inspect hidden areas such as behind walls and under flooring where water might’ve pooled.
Prompt action can prevent further damage and health risks associated with mold exposure.
Identify Moisture Sources
To effectively identify moisture sources in your home, you should start by checking for mold growth, as it often indicates underlying water issues.
Mold thrives in damp environments, so your moisture detection efforts should focus on areas where mold is present. Conduct a source analysis by examining walls, ceilings, and around windows for discoloration or peeling paint.
Don’t overlook less obvious spots, like behind appliances or under sinks, where leaks can occur. Use a moisture meter to quantify moisture levels, helping you pinpoint problem areas.
Addressing these moisture sources promptly prevents further damage and cultivates a healthier living space.
Inspect Hidden Areas
Identifying moisture sources is just the start; inspecting hidden areas is essential for uncovering mold growth that could signal deeper issues.
Check behind walls, under sinks, and within ceilings where hidden leaks may exist. Don’t overlook places where pipe insulation might be damaged or missing, as these can harbor moisture and promote mold development.
Use a moisture meter to assess areas that seem damp but aren’t visibly wet. If you spot any signs of mold, act quickly to address it, as it can lead to health risks and further structural damage.
Restore Affected Areas
Once the immediate threat of water damage is addressed, restoring the affected areas becomes an essential step in the recovery process.
Begin by evaluating the damage thoroughly. Identify areas where water has pooled, and check for structural integrity issues. You’ll want to remove any damaged materials, like drywall or flooring, to prevent mold growth.
Next, dry out the space using high-capacity fans and dehumidifiers. This can help you avoid further complications. If your property insurance covers water damage restoration, file a claim to recoup costs. Document the restoration process with photographs to support your claim.
Once everything is dry, you can start rebuilding. Replace any damaged materials and verify everything is up to code. This will restore functionality and preserve your home’s safety and comfort.
Prevent Future Incidents
While you can’t completely eliminate the risk of future water damage, taking proactive measures can greatly reduce the likelihood of incidents.
Start by investing in high-quality pipe insulation, especially in areas prone to freezing temperatures. This will help maintain ideal water temperatures and prevent freezing and bursting.
Regular maintenance is essential. Schedule annual inspections of your plumbing system to identify potential weaknesses or wear. Pay special attention to joints, connections, and older pipes, as these are often the first to fail.
Don’t forget to monitor your water pressure; excessive pressure can strain pipes, leading to leaks. Installing a pressure regulator can help maintain safe levels.
Finally, educate yourself and your household about the signs of potential issues, such as unusual noises or damp spots.
Final Thoughts
Recovering from a burst pipe requires swift action and thorough planning. By following these essential steps, you’re not just addressing the immediate damage—you’re safeguarding your home against future disasters. Remember, a stitch in time saves nine; acting now can save you from costly repairs later. So, take these measures seriously, and make certain your home remains a safe haven. Don’t let a burst pipe dampen your spirit—be proactive and protect your investment!
Recent Posts
Top 10 Tips for Detecting Leaking Pipes
Imagine discovering a significant water stain on your ceiling, only to realize it originated from
Why Choose Top Cleanup Services for Floods?
When floods strike, the damage can be overwhelming, and you need a swift response to
What to Expect From 24/7 Emergency Cleanup Services?
You might not realize that 24/7 emergency cleanup services can greatly reduce the long-term damage