Contents
When faced with a burst pipe, it’s vital to act swiftly and methodically. Start by identifying the source of the leak, then turn off the main water supply to prevent further damage. Next, assess the situation and consider temporary fixes to minimize water loss. Understanding these initial steps is essential, but proper cleanup and long-term prevention are just as important. Let’s explore effective strategies for managing and repairing burst pipes efficiently.
Key Takeaways
- Immediately turn off the main water supply to prevent further damage after a pipe bursts.
- Inspect the pipe for visible cracks or corrosion and document your findings.
- Apply temporary fixes like duct tape or epoxy putty to seal the leak.
- Use a wet/dry vacuum to extract water and prevent mold growth in affected areas.
- Invest in quality insulation and conduct regular plumbing inspections to prevent future bursts.
Identify the Source of the Burst Pipe
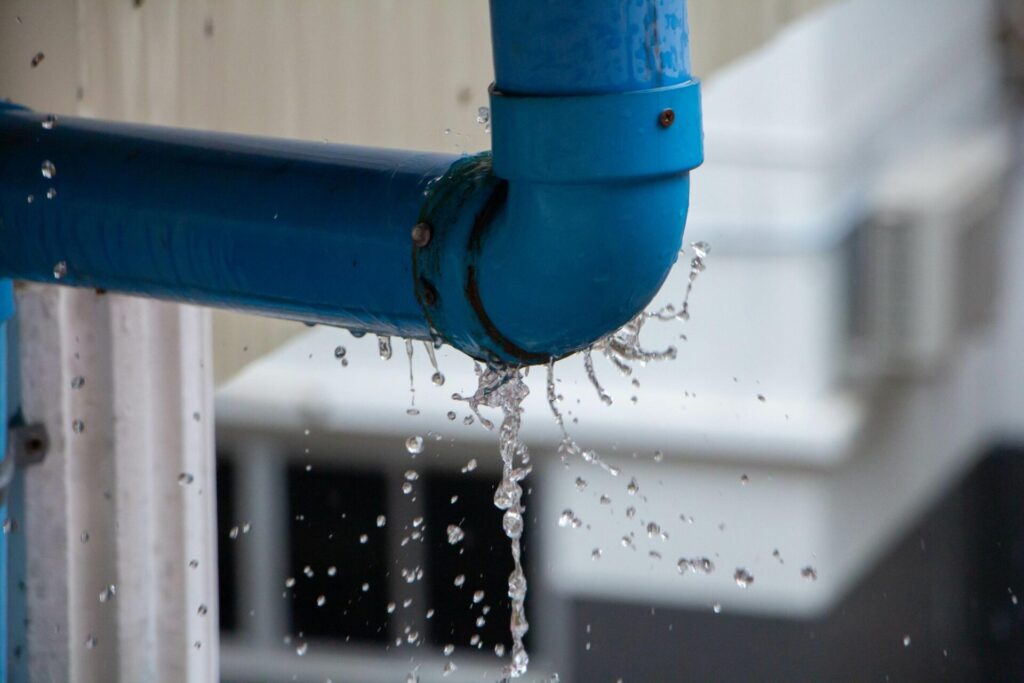
Before you can effectively repair a burst pipe, you need to identify its source. Start by inspecting the area around the pipe for visible signs of water damage or dampness.
Use leak detection methods, like moisture meters or infrared cameras, to pinpoint hidden leaks. Pay attention to common problem areas, such as joints or bends in the piping, where stress is likely to occur.
Once you’ve identified the leak, consider whether inadequate pipe insulation contributed to the issue. Pipes that lack proper insulation are more susceptible to freezing and bursting, especially in colder climates.
If you find that insulation is lacking, it’s essential to address this to prevent future incidents. Document your findings, as this information will be significant for any repair work or discussions with professionals.
Turn Off the Water Supply
When a pipe bursts, your first step is to locate the main water valve and turn it off to stop the flow.
Make sure to inform all household members about the situation to prevent further complications.
This quick action considerably reduces the risk of water damage, protecting your home and belongings.
Locate the Main Water Valve
How can you quickly prevent further water damage from a burst pipe?
First, you need to locate the main water valve in your home. This valve controls the water supply, so turning it off is essential for stopping the flow of water. Typically, the valve location is near the water meter or where the main water line enters your house. Knowing this spot enhances your water accessibility during emergencies.
Once you find the valve, turn it clockwise until it’s completely shut. This immediate action minimizes the damage caused by the burst pipe, protecting your home and belongings.
Inform Household Members
To effectively manage a burst pipe situation, it’s crucial to inform all household members immediately after shutting off the main water supply.
Use clear communication strategies to convey the urgency of the situation. Gather everyone in a central location to ensure everyone understands the steps taken and the importance of household readiness.
Explain that water is turned off to prevent further damage and discuss any immediate actions needed, like moving valuables or preparing for repairs.
Encourage questions to foster a sense of teamwork. By ensuring that everyone is on the same page, you minimize confusion and enhance your household’s collective response to the emergency, reinforcing a sense of belonging and shared responsibility during a stressful time.
Reduce Water Damage Risk
Immediately turning off the water supply is crucial for minimizing water damage after a pipe bursts. By shutting off the main valve, you can prevent further flooding and protect your home from significant structural issues.
Locate the valve, usually found near the water meter, and turn it clockwise to stop the flow. Once the water is off, you can assess the damage and implement repair techniques effectively.
This proactive step safeguards your belongings and helps reduce the overall repair costs. Remember, the quicker you act, the less extensive the water damage will be.
After addressing the immediate issue, consider consulting a professional for thorough repairs to ensure long-term solutions and prevent future incidents.
Drain the Remaining Water
Draining the remaining water from a burst pipe is essential to prevent further damage and prepare for repairs.
Once you’ve identified the source of the leak, quick and effective water removal is vital. Here’s how to get started:
Turn off the main water supply: This stops any new water from entering the pipes.
Use a wet/dry vacuum: This tool is perfect for extracting water from affected areas.
Mop up any remaining moisture: Don’t forget corners and crevices where water might accumulate.
Conduct a thorough pipe inspection: Check for additional leaks or damage while the area is clear.
Assess the Damage
Once you’ve removed the water, it’s important to assess the damage to determine the extent of the repairs needed.
Begin with a thorough damage assessment, focusing on both the visible and hidden areas affected by the burst pipe. Conduct a visual inspection of the surrounding walls, flooring, and any insulation materials.
Look for signs of warping, discoloration, or mold, as these could indicate moisture retention and potential structural issues.
Check for any weakened materials that may need replacement. Don’t forget to evaluate the pipe itself for cracks or corrosion.
Document your findings, as this will guide your repair process and help establish if professional assistance is required.
By taking these steps, you ensure that you fully understand the damage, allowing for effective and lasting repairs.
This careful approach fosters a sense of community, as you’re taking responsibility for your living space and helping others who may face similar issues.
Use Temporary Fixes
While you assess the damage, it’s essential to implement temporary fixes to minimize further water loss and prevent additional structural damage.
Quick actions can save you from larger headaches later. Here are some effective methods to reflect upon:
Duct Tape: Wrap it tightly around the damaged area to create a waterproof seal.
Epoxy Putty: Mold it and apply it directly to the leak for a strong, durable fix.
Rubber Patch: Cut a piece of rubber from an old hose or inner tube, and secure it over the leak with clamps or tape.
Bucket or Container: Position it beneath the leak to catch dripping water while you plan for a permanent repair.
These temporary solutions can help you manage the situation until you’re ready to tackle a more permanent fix.
Your quick thinking can greatly reduce water damage and keep your home safe.
Choose the Right Repair Method
When dealing with a burst pipe, selecting the right repair method is essential for long-term success.
You can choose between temporary fix solutions, which can provide immediate relief, or permanent repair options that ensure your plumbing system remains reliable.
Assess the severity of the damage and your immediate needs to make an informed decision.
Temporary Fix Solutions
If you encounter a burst pipe, choosing the right temporary fix can prevent extensive water damage and provide immediate relief.
Here are some effective solutions to take into account:
Pipe clamps: Securely fasten around the damaged section to minimize leakage.
Epoxy putty: Mold this handy solution over the leak for a watertight seal.
Rubber patch: Place a piece of rubber over the damaged area and secure it with a hose clamp.
Duct tape: Wrap tightly around the leak for a quick and easy short-term fix.
These methods can buy you time until you arrange for a permanent repair.
Permanent Repair Options
After implementing temporary solutions to manage a burst pipe, it’s time to contemplate permanent repair options to ensure lasting effectiveness and reliability.
One effective method is using permanent sealants, which can provide a durable fix for smaller leaks. These sealants bond strongly with the pipe material, ensuring a long-lasting repair.
However, if the damage is extensive, pipe replacement might be necessary. This method involves removing the damaged section and installing a new pipe, ensuring peak performance and preventing future leaks.
Whichever option you choose, prioritize quality materials and follow proper installation procedures.
Clean Up and Dry the Affected Area
Cleaning up and drying the affected area is essential to prevent further damage and mold growth after a burst pipe. You need to act quickly to minimize the impact.
Start with water extraction to remove any standing water, which is critical for effective mold prevention. Here are some steps to follow:
- Use a wet/dry vacuum to extract water efficiently.
- Remove soaked materials like carpets and drywall to speed up drying.
- Use fans or dehumidifiers to circulate air and reduce humidity.
- Clean surfaces with a mixture of water and detergent to eliminate contaminants.
Prevent Future Burst Pipes
Taking proactive measures can greatly reduce the risk of future burst pipes. Start by investing in quality pipe insulation, especially for vulnerable areas like basements and attics. Insulating your pipes helps maintain a stable temperature and prevents freezing during cold spells.
Additionally, don’t overlook the importance of seasonal maintenance. Before winter arrives, check for any signs of wear and tear, and verify your plumbing system is in good shape. Regularly inspect joints and connections for leaks, and consider draining outdoor hoses and shutting off valves as temperatures drop.
Moreover, keeping your home’s temperature consistent throughout the day can also help prevent pipes from freezing. By implementing these strategies, you create a resilient plumbing system that can withstand harsh conditions.
Building this sense of community around proactive pipe care will protect your home and foster a shared commitment to maintaining a safe living environment.
Summary
Effectively repairing a burst pipe is like patching a hole in a dam; timely action is essential to prevent further damage. By quickly identifying the source, turning off the water supply, and using temporary fixes, you can mitigate the situation. Once you’ve addressed the leak, make certain thorough cleanup to avoid mold growth. Finally, investing in quality insulation and regular maintenance will help you avoid future incidents, keeping your plumbing system in top shape.
Recent Posts
Top Tools for Efficient Home Flood Recovery
When facing home flood recovery, it’s vital to have the right tools at your disposal.
7 Best Tools for Effective Flood Cleanup
When tackling flood cleanup, knowing what tools to use, understanding their purpose, and mastering their
What Are Effective Techniques for Detecting Pipe Leaks?
Detecting pipe leaks is essential for maintaining infrastructure and preventing costly damage. You can utilize