Contents
Is it really possible to effectively manage storm damage cleanup on your own? Many believe that a DIY approach can save time and money, but the reality often involves hidden complexities and risks. Understanding the critical steps involved can make all the difference in ensuring a thorough recovery. By examining the best strategies, you’ll uncover methods that restore your property and protect your investment in the long run.
Key Takeaways
- Conduct thorough inspections to assess and document all types of damage for insurance claims, using detailed photographs and incident reports.
- Ensure safety by utilizing personal protective equipment and creating a hazard assessment checklist for the cleanup team.
- Employ effective water removal techniques, including pumps and wet vacuums, and implement drainage solutions to prevent future flooding.
- Regularly inspect and maintain gutters, downspouts, and landscaping to direct water away from the foundation and enhance drainage.
- Seek professional assistance for cleanup and repairs to ensure safety and expedite the insurance claims process with detailed documentation.
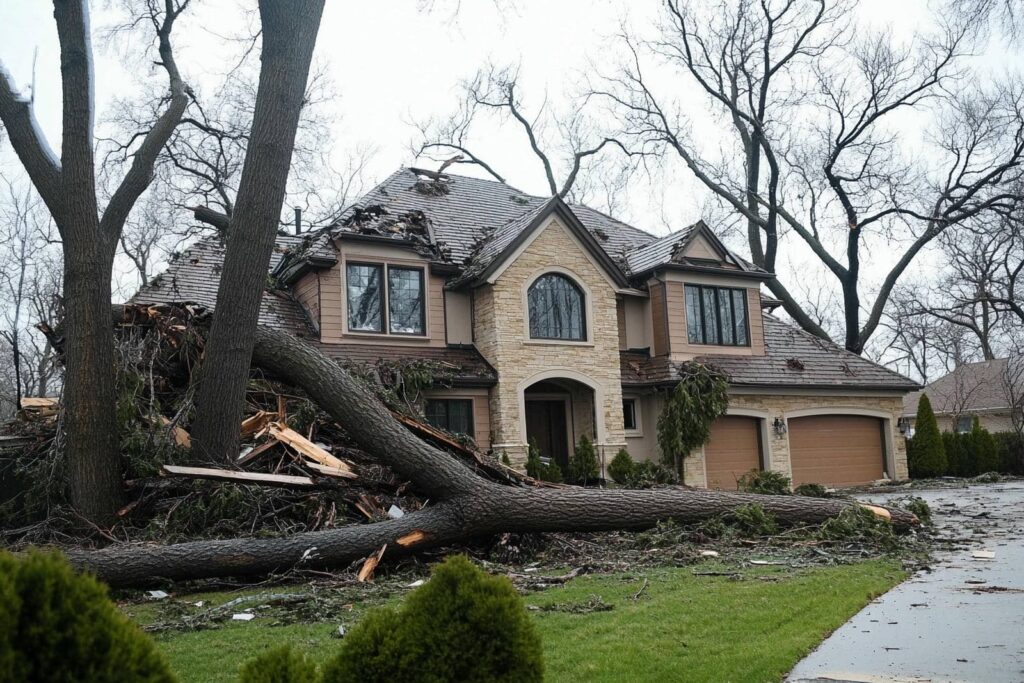
Assessing the Damage
When evaluating storm damage, it’s crucial to approach the situation methodically to ensure nothing is overlooked.
Start with an initial inspection of your property, focusing on various damage types, including structural, water, and wind damage. Take your time to document each area thoroughly; photographs will be invaluable for insurance claims.
Look for signs of roof leaks, broken windows, and damaged siding, as these can lead to further issues if not addressed promptly.
Don’t ignore your yard—downed trees and debris can pose safety hazards and affect your property’s overall aesthetics.
While evaluating, note the severity of each damage type, prioritizing areas that require immediate attention.
This organized approach helps you understand the extent of the destruction and fosters a sense of community as you may share your findings and solutions with neighbors facing similar challenges.
Ensuring Safety First
Before you start any cleanup effort, it’s essential to prioritize your safety.
Equip yourself with the right personal protective equipment and create a hazard assessment checklist to identify potential dangers.
Taking these steps safeguards you and sets a responsible tone for the cleanup process.
Personal Protective Equipment
While storm damage cleanup can be intimidating, prioritizing personal protective equipment (PPE) is crucial for your safety.
Start with sturdy boots that provide traction and protect against sharp debris. A hard hat shields your head from falling objects, while safety glasses keep dust and particles out of your eyes. Don’t forget gloves; they protect your hands from cuts and hazardous materials.
When choosing protective gear, ensure it meets safety standards to maximize your protection. Additionally, consider masks to filter out harmful airborne particles.
Hazard Assessment Checklist
How can you ensure a safe environment during storm damage cleanup? Start by implementing a thorough hazard assessment checklist.
Use effective hazard identification methods to pinpoint potential dangers like downed power lines, unstable structures, and hazardous debris.
Next, apply risk evaluation techniques to prioritize these hazards based on severity and likelihood of occurrence.
Document your findings, ensuring everyone involved understands the risks.
Communicate openly with your cleanup team, fostering a sense of belonging and teamwork.
Equip them with personal protective equipment and clear instructions on how to handle identified hazards.
Documenting the Incident
When disaster strikes, documenting the incident is essential for effective cleanup and recovery. Start by creating a detailed incident report, noting the date, time, and location of the storm. Include specifics about the damage, such as affected structures, debris, and hazards. This report serves as a foundational document for insurance claims and recovery efforts.
Next, gather photographic evidence to complement your report. Take clear, well-lit photos from multiple angles to capture the extent of the damage. This visual documentation supports your claims and helps you track progress during the cleanup process.
Make sure to organize all your documentation in a way that’s easy to access. By being methodical and thorough, you’ll facilitate a smoother recovery process and foster a sense of community support as you share your experience with neighbors facing similar challenges.
Removing Water Efficiently
As soon as the storm subsides, promptly removing water is essential to prevent further damage and mold growth.
Start by evaluating the affected areas and identifying the most effective water removal techniques for your situation. Using a combination of pumps, wet vacuums, and mops can help you tackle standing water efficiently.
Consider implementing efficient drainage solutions, such as directing water away from your home’s foundation and ensuring gutters are clear.
If the water level is significant, you might need to enlist professional help to expedite the process.
Drying and Dehumidifying the Area
Once you’ve removed standing water, the next critical step is drying and dehumidifying the area to prevent mold growth and structural damage.
Start by using fans and dehumidifiers to circulate air and reduce humidity levels. Position these devices strategically to maximize airflow, ensuring every corner of the affected area is addressed.
Keep an eye on moisture monitoring tools to track humidity levels; this will help you understand when the area is adequately dried.
Consider sealing off the space to enhance humidity control, preventing outside moisture from complicating your efforts.
If conditions allow, open windows and doors to promote cross-ventilation.
Remember, the longer you leave the area damp, the higher the risk for mold and decay.
Cleaning and Sanitizing Affected Surfaces
After ensuring the area is thoroughly dried, it’s essential to assess contaminated surfaces for any signs of mold or bacteria.
You’ll need to choose the right disinfectants that effectively eliminate pathogens without damaging the materials.
This targeted approach promotes a healthier environment and prevents further deterioration of your property.
Assessing Contaminated Areas
When storm damage strikes, evaluating contaminated areas becomes critical for ensuring safety and preventing further issues.
Start by inspecting your property for contaminated soil, which may harbor harmful pathogens or toxins. Collect soil samples and send them for professional testing to determine the extent of contamination.
Don’t forget to check standing water; it can carry pollutants and bacteria. Conduct water testing to assess its safety for use or consumption.
Remember, even if the surface appears clean, underlying contaminants can pose serious health risks.
As you assess these areas, document your findings meticulously to inform cleanup strategies. Your diligence in evaluation protects your health and fosters a sense of community resilience during recovery efforts.
Using Proper Disinfectants
Following your assessment of contaminated areas, the next step involves using proper disinfectants to clean and sanitize affected surfaces.
Start by selecting disinfectant types suitable for specific materials—bleach solutions work well on non-porous surfaces, while hydrogen peroxide is effective for porous ones. Verify you read product labels for safety and dilution instructions.
When applying disinfectants, use techniques like spraying or wiping, allowing sufficient contact time to maximize effectiveness.
Don’t forget to wear protective gear, such as gloves and masks, to safeguard your health.
After disinfecting, rinse surfaces if necessary, especially in food preparation areas.
Repairing Structural Damage
Although structural damage can seem intimidating, addressing it promptly is essential for ensuring the safety and stability of your property.
Start by evaluating the extent of the damage; check for cracks in walls, sagging roofs, or uneven floors, as these can indicate compromised structural integrity. Document everything with photos to guide your repair techniques and to communicate effectively with contractors.
Once you’ve identified the issues, consider consulting a structural engineer for expert advice. They can recommend specific repair techniques tailored to your property’s needs.
For minor damages, you might use epoxy injections for cracks or reinforce beams with steel plates. If the damage is severe, you’ll likely need professional help to ensure repairs meet building codes.
Preventing Future Water Issues
To effectively prevent future water issues, you must first identify and address the vulnerabilities in your property’s drainage and waterproofing systems.
Start by examining your gutters and downspouts; make sure they’re clear and direct water away from your foundation. Consider implementing advanced drainage solutions, such as French drains or dry wells, to manage excess water.
Next, invest in reliable waterproofing techniques, like sealants and membranes, especially in basements and crawl spaces. These prevent moisture ingress and protect your home’s structural integrity.
Regularly inspect these systems, particularly after heavy rains, to catch any emerging problems before they escalate.
Additionally, landscaping plays an essential role; make sure that soil slopes away from your home to facilitate proper drainage.
Seeking Professional Assistance
After taking steps to prevent future water issues, you might find that some situations require more expertise than DIY solutions can provide. In these scenarios, seeking professional assistance becomes essential.
Emergency services specializing in storm damage can assess the extent of the damage and implement effective cleanup strategies. They’ve the equipment and training necessary to handle hazardous materials and structural repairs safely.
Moreover, professionals can help navigate the complexities of insurance claims. Their documentation and detailed reports are invaluable when you need to substantiate your claim with your insurance provider. This speeds up the process and increases the likelihood of a favorable outcome.
Summary
In the aftermath of a storm, your home can feel like a shipwreck, battered and vulnerable. By following these strategies, you can navigate the turbulent waters of cleanup and restore your sanctuary. Assess the damage, prioritize safety, and don’t shy away from seeking help when needed. With each step, you’re not just mending walls and floors; you’re breathing life back into your space, ensuring it stands strong against future storms like a lighthouse resilient against crashing waves.
Recent Posts
Top Tools for Efficient Home Flood Recovery
When facing home flood recovery, it’s vital to have the right tools at your disposal.
7 Best Tools for Effective Flood Cleanup
When tackling flood cleanup, knowing what tools to use, understanding their purpose, and mastering their
What Are Effective Techniques for Detecting Pipe Leaks?
Detecting pipe leaks is essential for maintaining infrastructure and preventing costly damage. You can utilize